
Assembly & Wearing
How securely you wear the trackers and whether their orientation matches the diagrams directly affects calibration and tracking quality. This page covers the GoPro chest mount, strap clips and recommended placement points.
GoPro Chest Mount Assembly
- Prepare the chest mount, fixing clip and a tracker.
- Push the clip into the chest-mount socket following the arrow on the clip.
- Slide the tracker in along the slot and confirm the clip is locked.
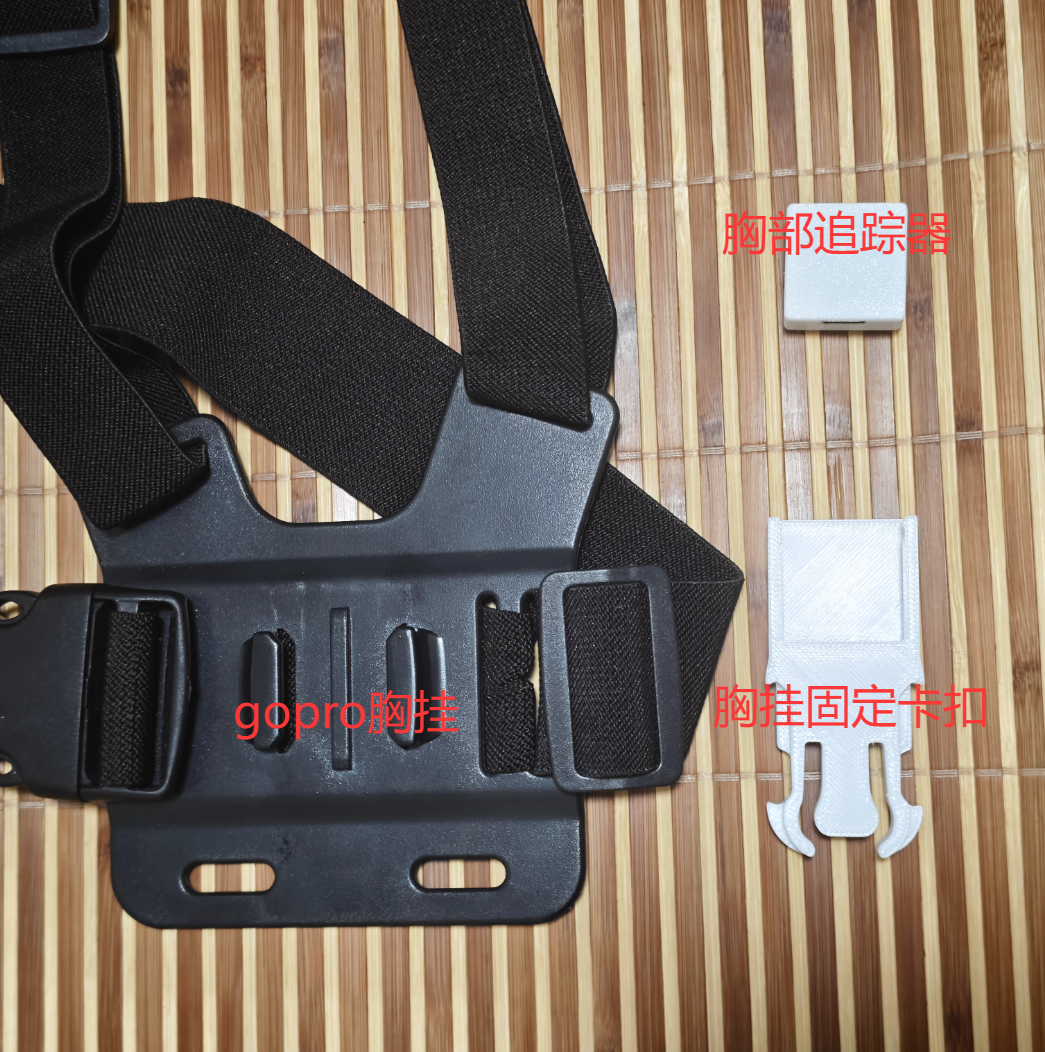
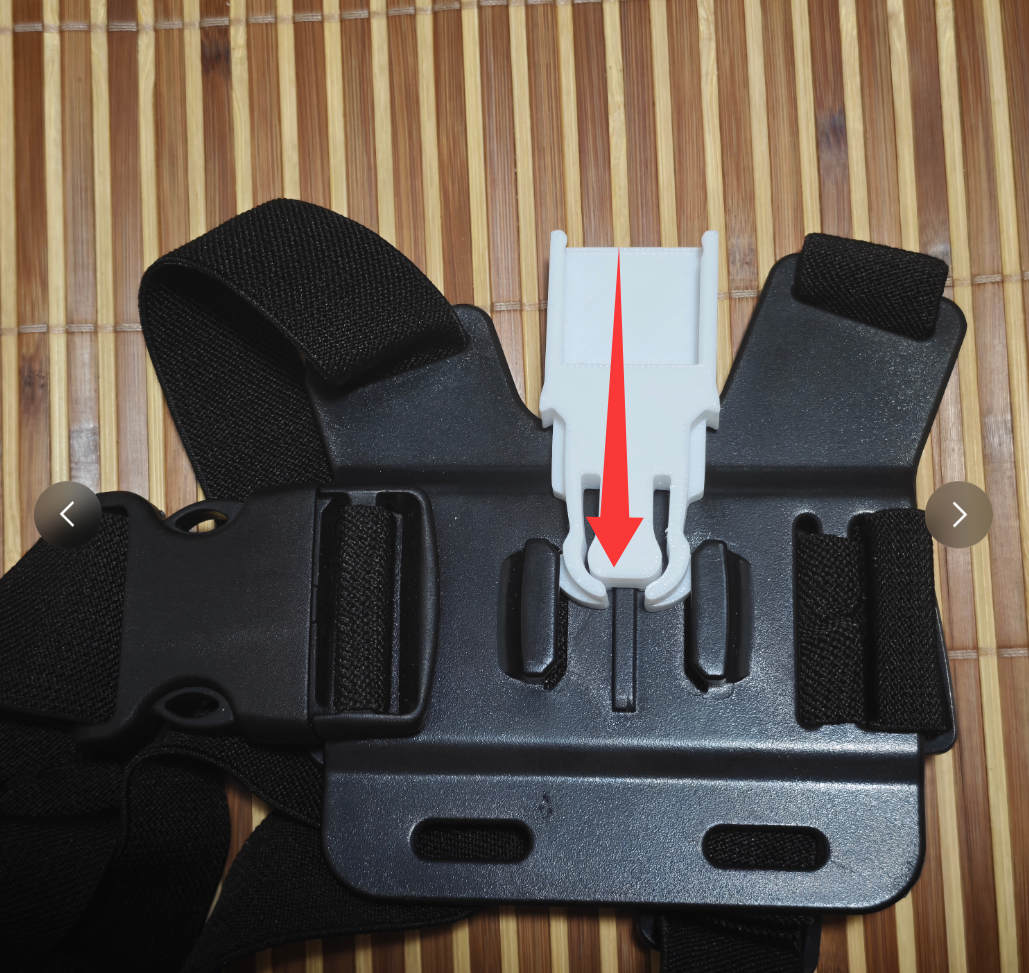
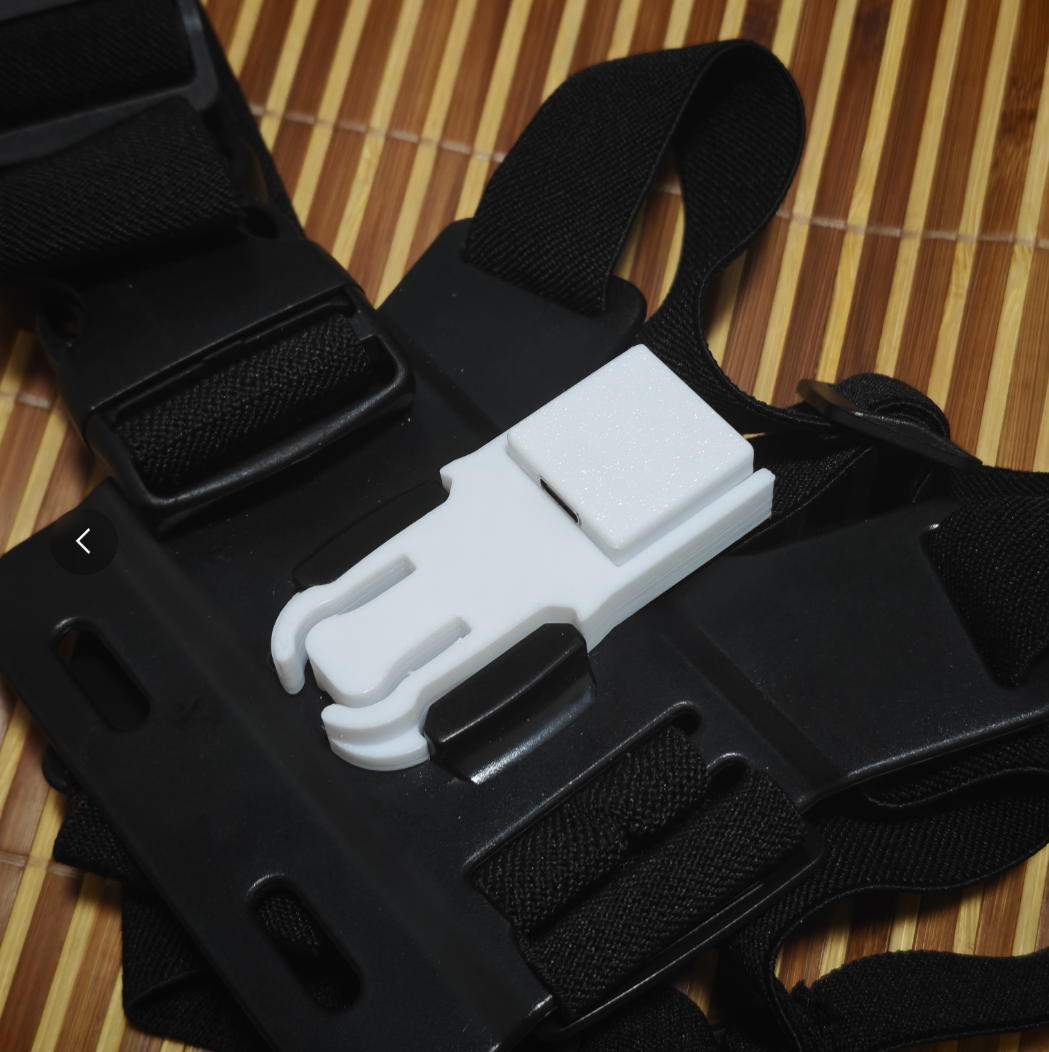
Mounting direction
Do not force the clip in the wrong direction, or you may damage it.
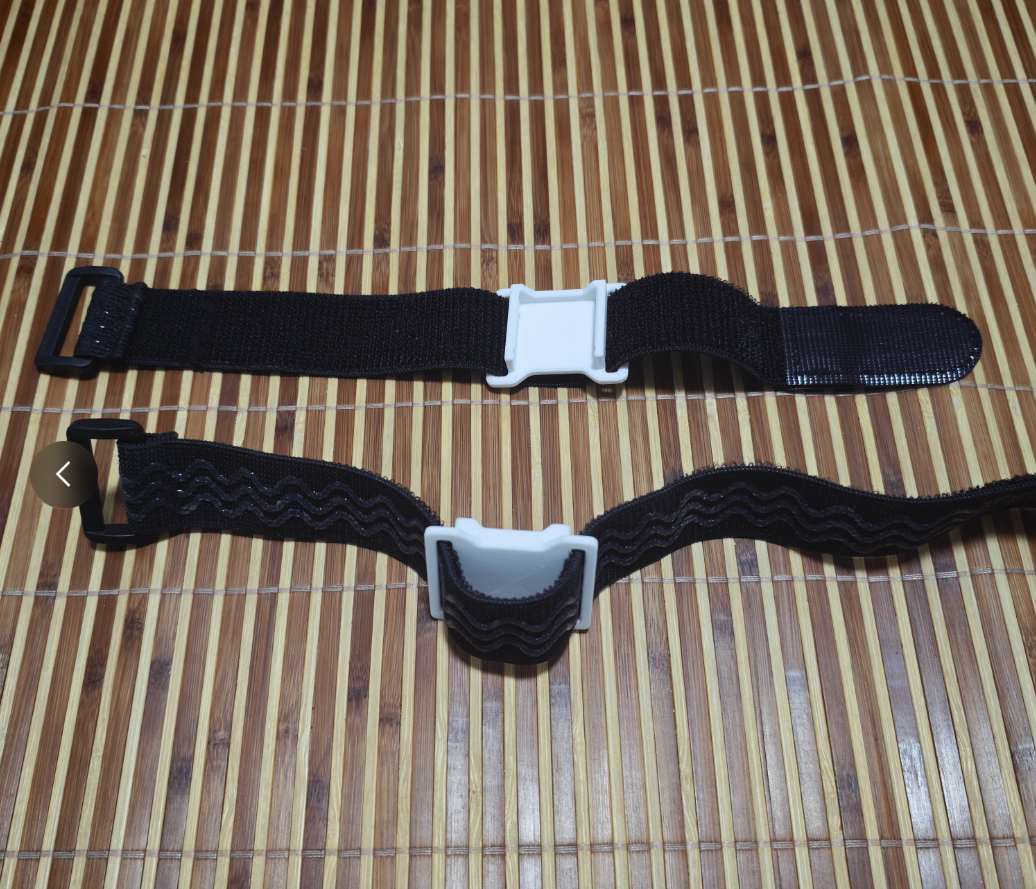
Strap Assembly
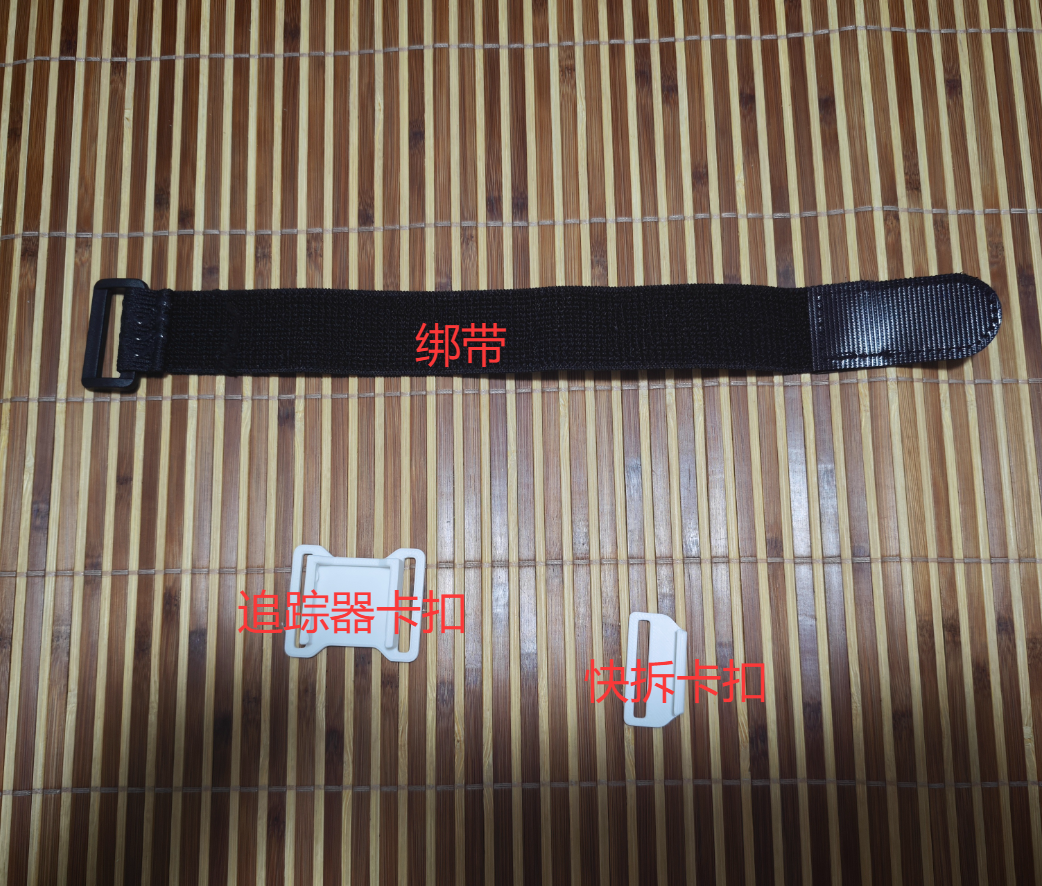
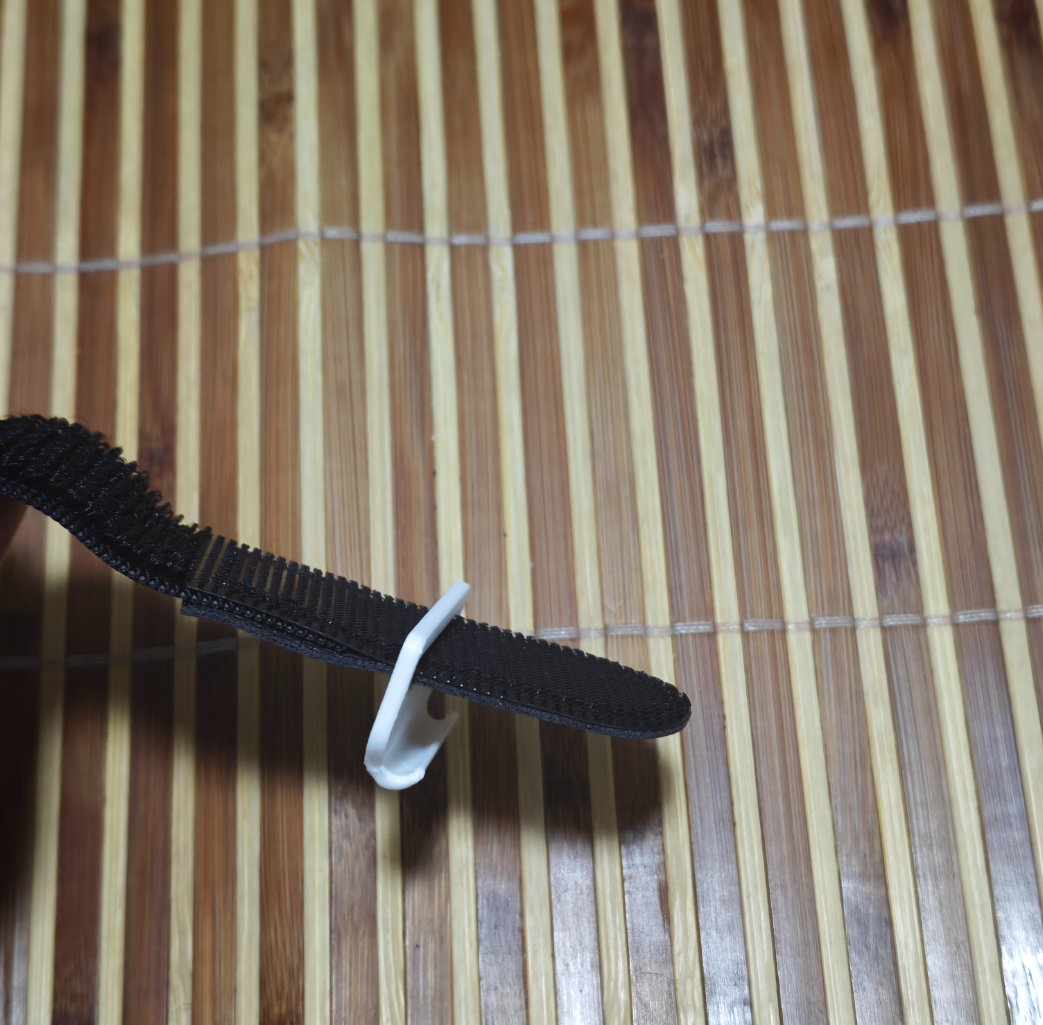
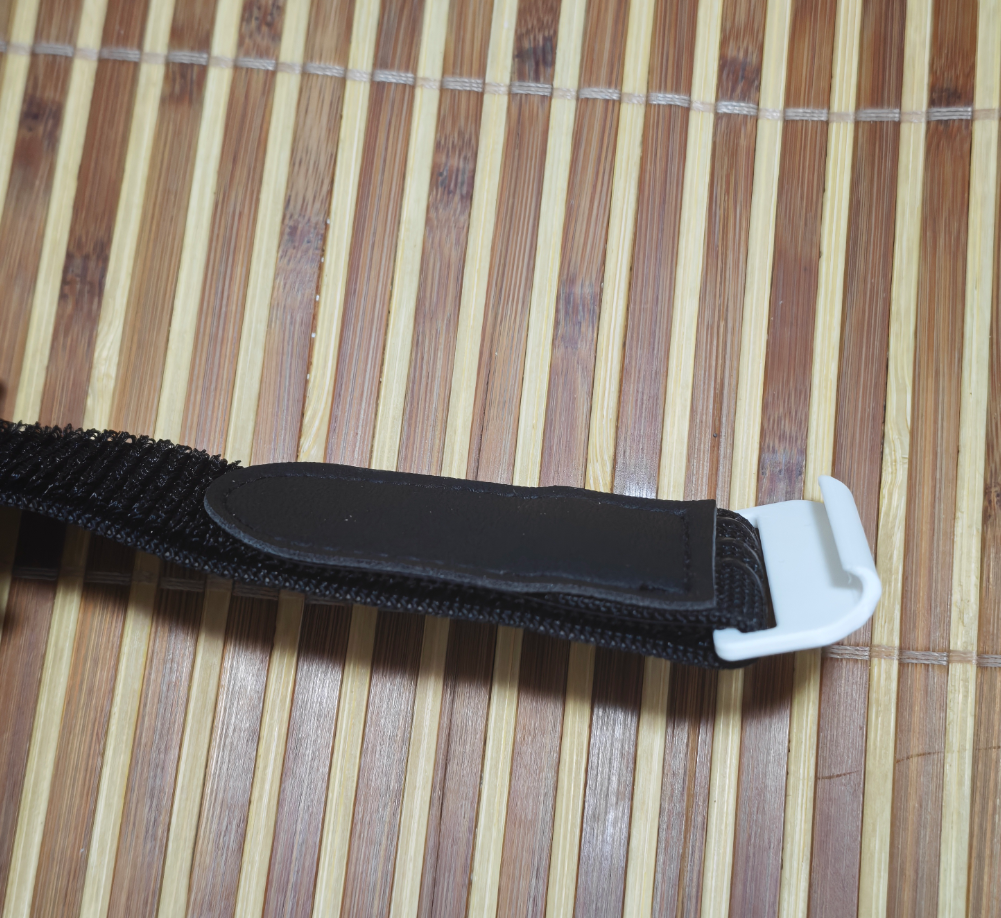
- Prepare the strap, tracker clip and quick-release clip.
- With the silicone anti-slip side of the strap facing down, attach the strap to the tracker clip.
- Snap in the quick-release clip in the correct direction.
- Adjust the length, then close the hook-and-loop fastener.
Recommended Wearing Points
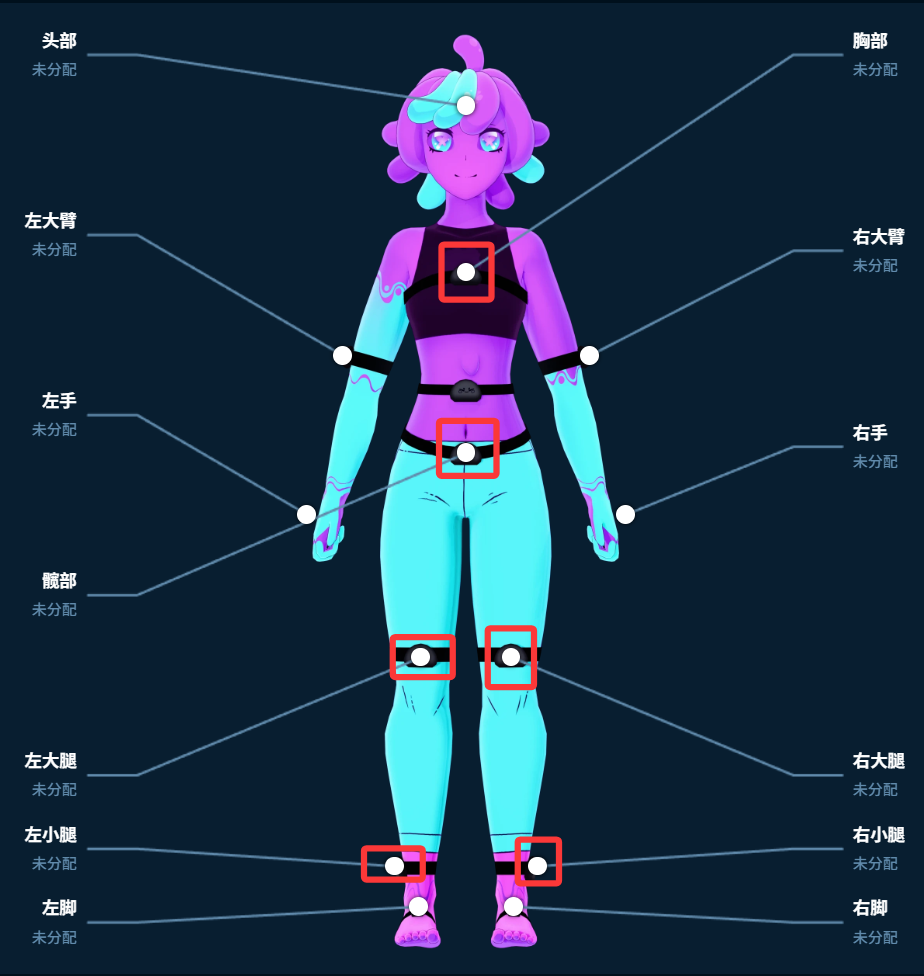
In the original manual, red markers indicate the recommended 6-point positions, and green markers indicate the extra positions for 8 or 10 points.
Note
The text outside the dotted lines next to the markers is the name of each point.
| Setup | Description |
|---|---|
| 6 points | Base recommended setup; wear according to the red markers |
| 8 points | Adds two extra points on top of the 6-point setup |
| 10 points | Adds two more points on top of the 8-point setup |
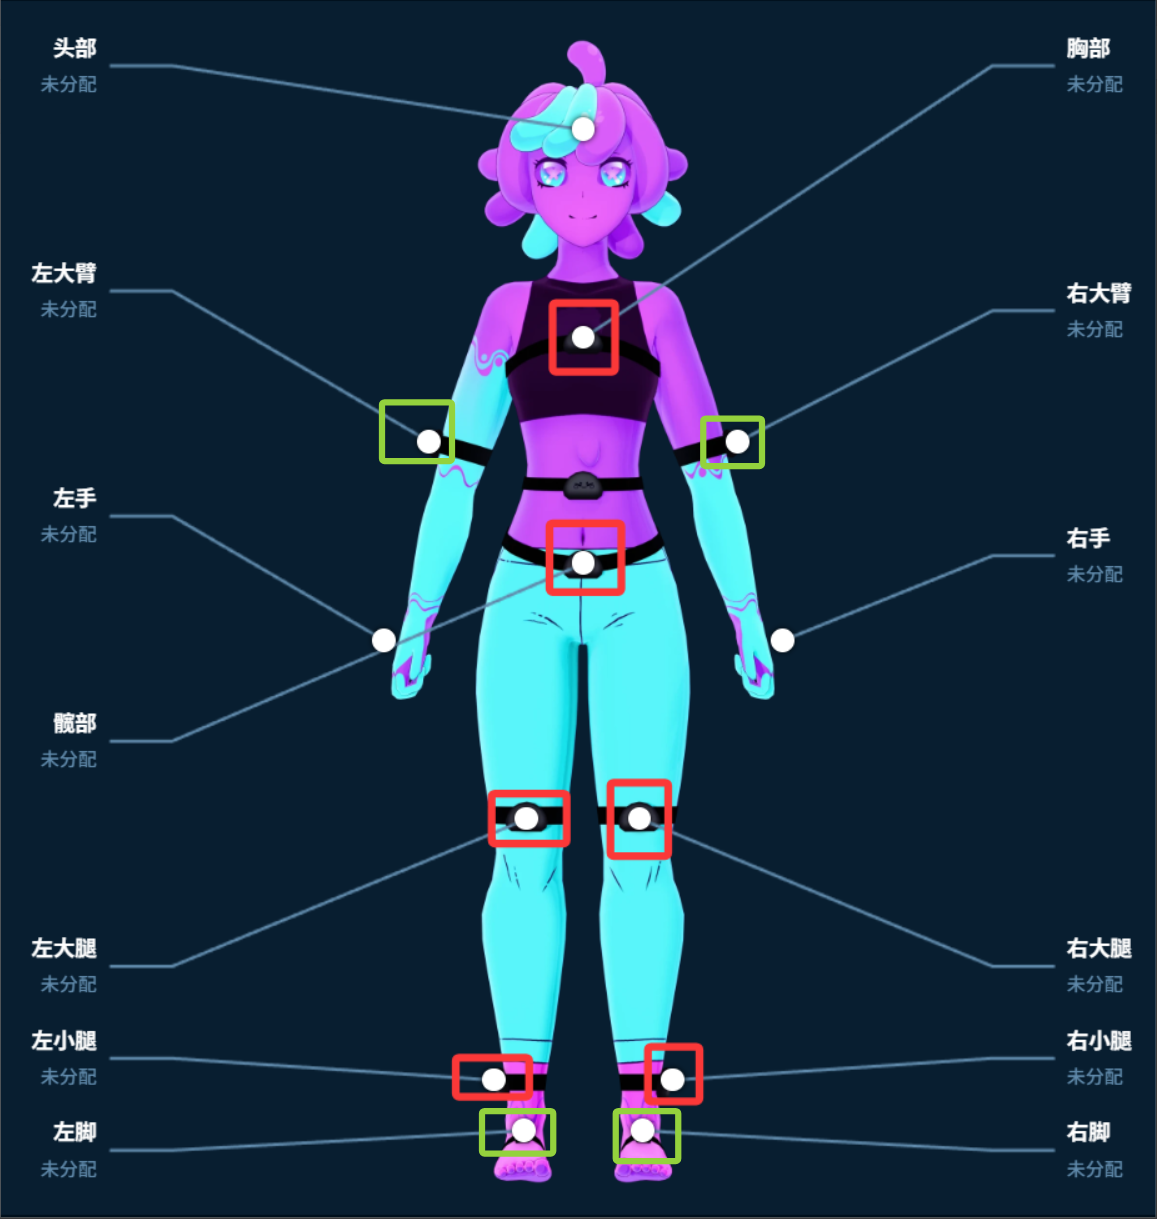
Wearing notes for each point
- Chest tracker: secure it to your chest with the GoPro chest mount and chest-mount tracker clip, at about heart height — keep it centered on your body.
- Hip tracker: wear it at your lower abdomen (about 10 cm below the navel), not on the belly. When sitting, check that the tracker is not pushed out of position by the belly; if it is, wear it on the back at the same spot instead (uneven legs when sitting is often caused by the hip tracker being squeezed).
- Thigh tracker: wear it on the front of the thigh just above the knee — do not wear it on the side. After fastening, move the joint to make sure the tracker does not shift or wobble; if it does, adjust the strap position or tighten it.
- Shin tracker: wear it at the position shown in the diagram, as low as possible, but make sure ankle movement does not push the tracker out of place.
- Upper-arm tracker: wear it just above the first arm joint; direction does not matter much. Move your arm to make sure joint movement does not shift the tracker.
- Foot tracker: wear it on the middle of the foot, pointing up, and make sure movement does not push it out of place.
Wearing Checklist
- Trackers on left and right symmetric positions should be at roughly the same height.
- Straps should fit snugly without restricting blood flow or joint movement.
- Tracker orientation should match the diagrams.
- After intense movement, if any strap has shifted, re-run the wearing calibration.